Documentation > Tutorials
The composition of a full exploration experiment is achieved by writing a script in the OpenMOLE language, which is an extension of the Scala language. Such a script is called a @i{workflow} and should contain: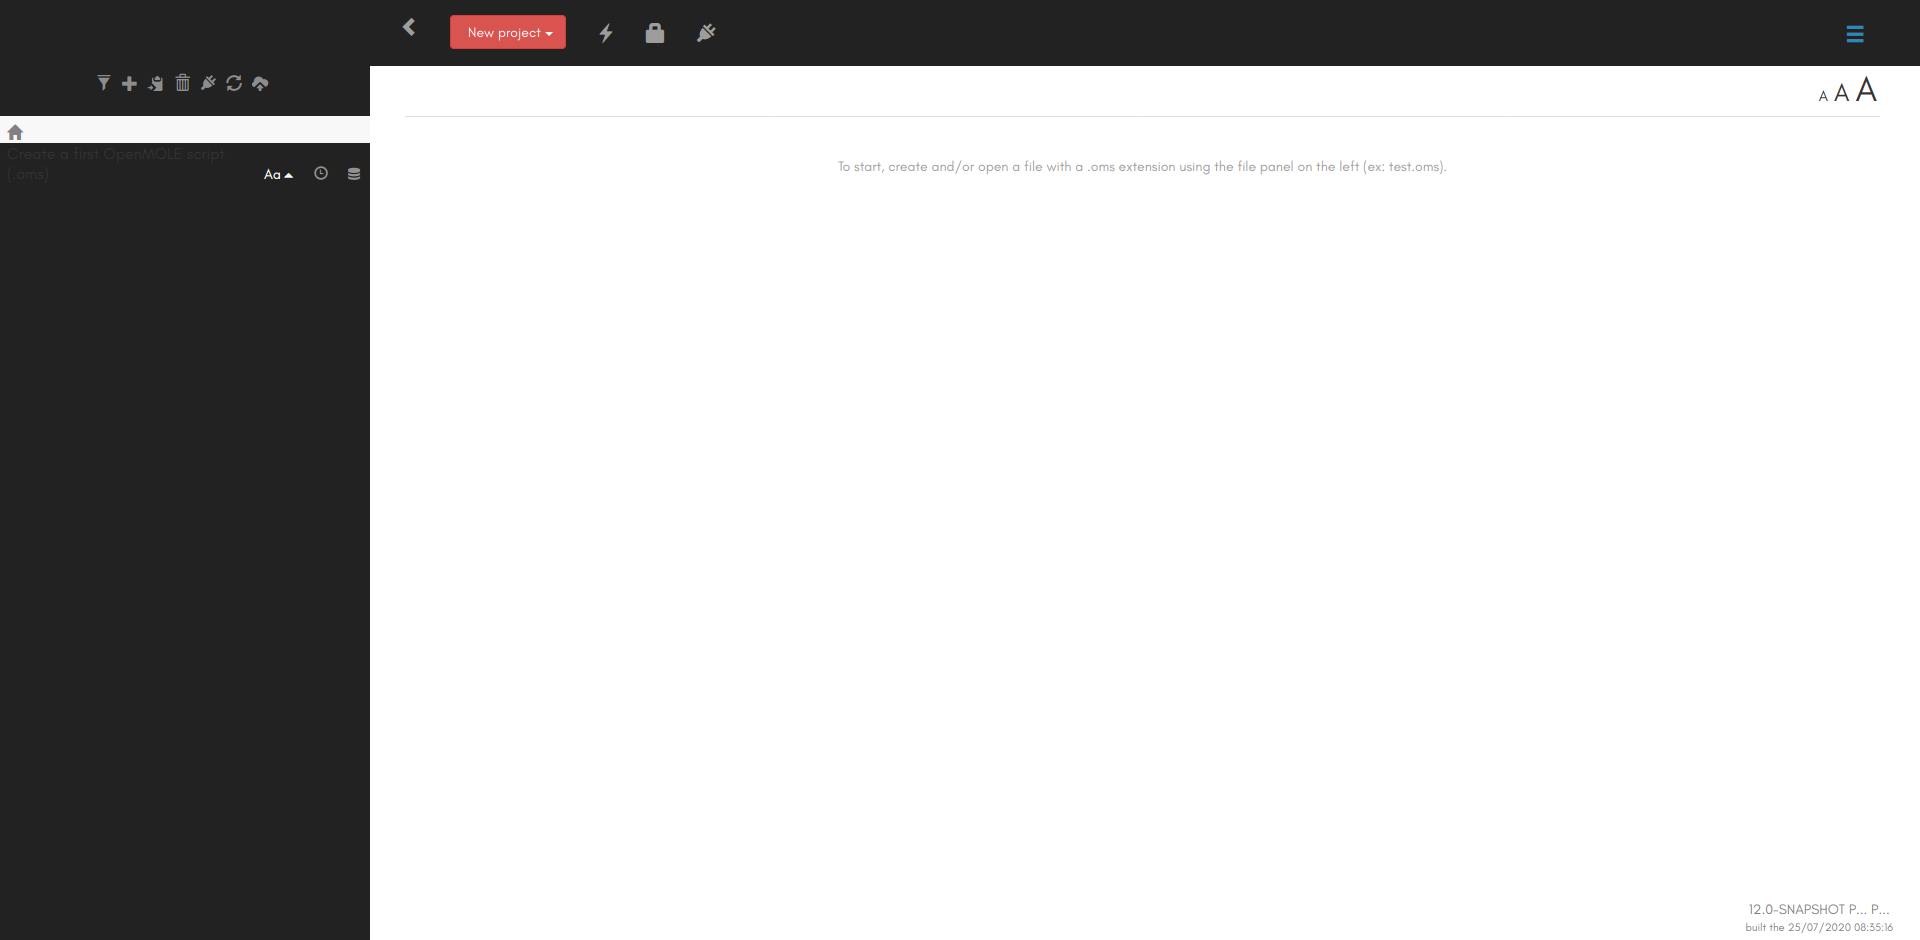
Once you've downloaded the model on your computer, you need to import it in OpenMOLE. There are two ways to do that, either by using the "upload a file" button on the left series of icons to import the .nlogo file as is, or by using the "New project" button and selecting "Import your model" to open the model wizard. The model wizard will automatically detect the language in which the file is written, and the input and output parameters of your model: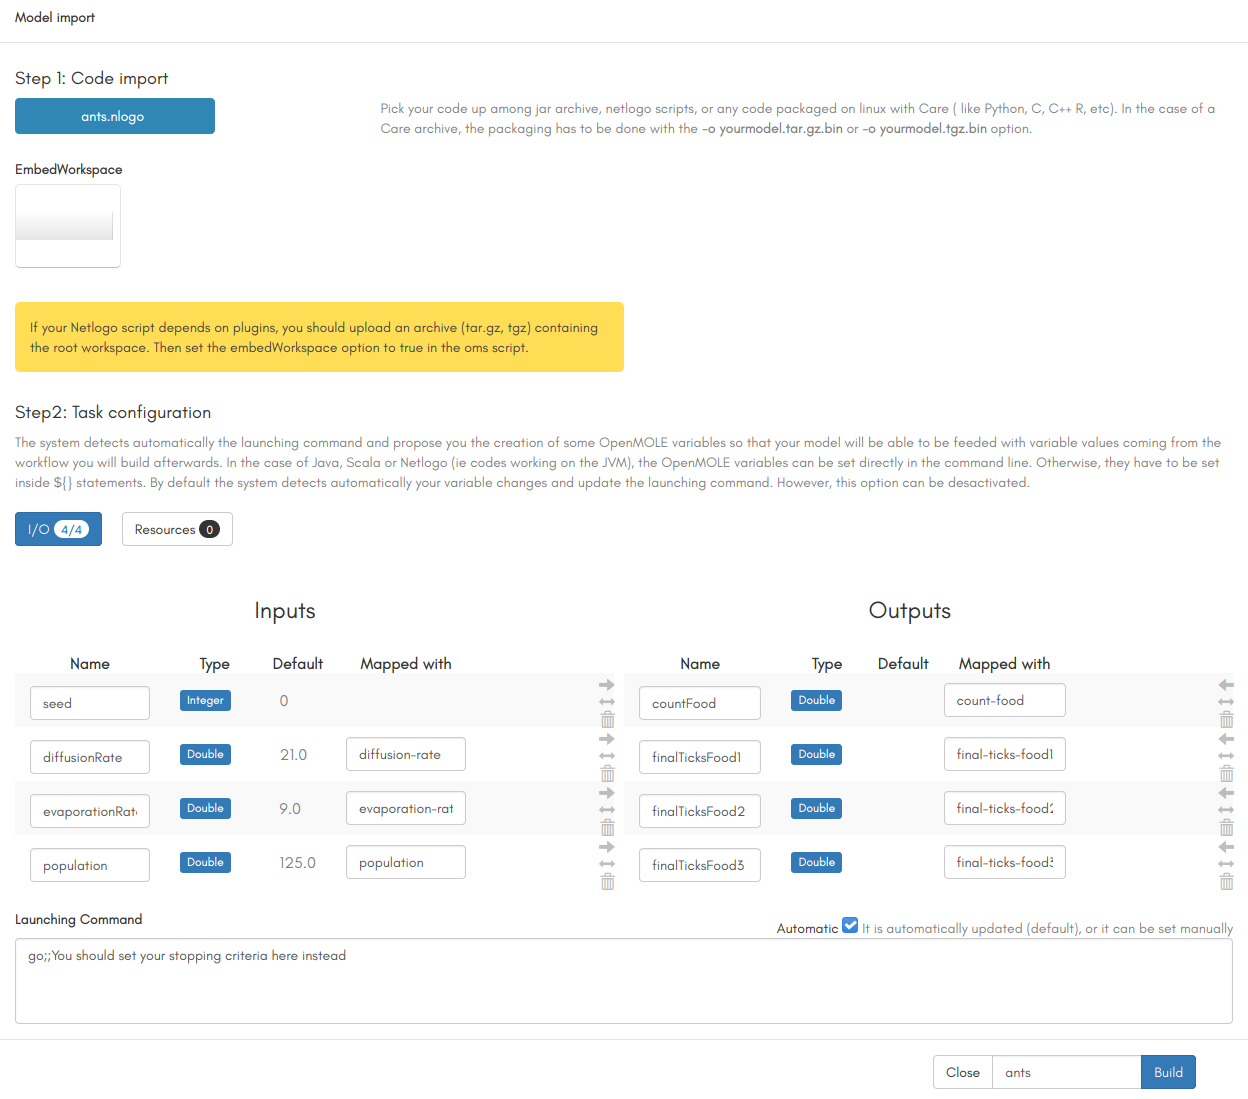
Content:
Overview 🔗
OpenMOLE is a model exploration tool. It offers several methods to perform experiments on a model, in order to better understand its behavior and capabilities.The composition of a full exploration experiment is achieved by writing a script in the OpenMOLE language, which is an extension of the Scala language. Such a script is called a @i{workflow} and should contain:
- some tasks (the model to explore needs to be embedded in a task for instance),
- their inputs and outputs as objects,
- an exploration method,
- some hooks to save or display the results of the exploration,
- and optionally, an execution environment.
Installing OpenMOLE on your computer 🔗
After downloading OpenMOLE, launch it by executing the openmole file in the installation directory with the./openmole command in a terminal.
Once OpenMOLE is up and running in your browser, you should see the GUI:
Importing a toy model: Ants 🔗
To illustrate this tutorial, we will be using the Ants model from the NetLogo library. The model is available here.Once you've downloaded the model on your computer, you need to import it in OpenMOLE. There are two ways to do that, either by using the "upload a file" button on the left series of icons to import the .nlogo file as is, or by using the "New project" button and selecting "Import your model" to open the model wizard. The model wizard will automatically detect the language in which the file is written, and the input and output parameters of your model:
Executing the Ants model in OpenMOLE 🔗
Workflow 🔗
Based on the automatically detected parameters and NetLogo commands, the model wizard creates an OpenMOLE script containing variables for the inputs and outputs, and a basic workflow to run your model. If you didn't use the model wizard to import the Ants model, you will need to write a workflow to execute it, similar to the one generated by the wizard and containing all the basics. The .oms script generated for the Ants model is shown here:// Input values
val mySeed = Val[Int]
val diffusionRate = Val[Int]
val evaporationRate = Val[Int]
val population = Val[Int]
// Output values
val countFood = Val[Double]
val finalTicksFood1 = Val[Double]
val finalTicksFood2 = Val[Double]
val finalTicksFood3 = Val[Double]
// NetLogo commands list
val launch = List(
"setup",
"go ;;You should set your stopping criteria here instead"
)
// NetLogo task
val antsTask = NetLogo7Task(
workDirectory / "ants.nlogo", // netlogo file
launch, // launching commands
seed = mySeed // set the random seed
) set (
inputs += diffusionRate mapped "diffusion-rate",
inputs += evaporationRate mapped "evaporation-rate",
inputs += population mapped "population",
outputs += countFood mapped "count-food",
outputs += finalTicksFood1 mapped "final-ticks-food1",
outputs += finalTicksFood2 mapped "final-ticks-food2",
outputs += finalTicksFood3 mapped "final-ticks-food3",
// Default values. Can be removed if OpenMOLE Vals are set by values coming from the workflow
mySeed := 0,
diffusionRate := 21,
evaporationRate := 9,
population := 125
)
// Workflow containing a hook to display execution outputs
antsTask hook display
Execution of the workflow 🔗
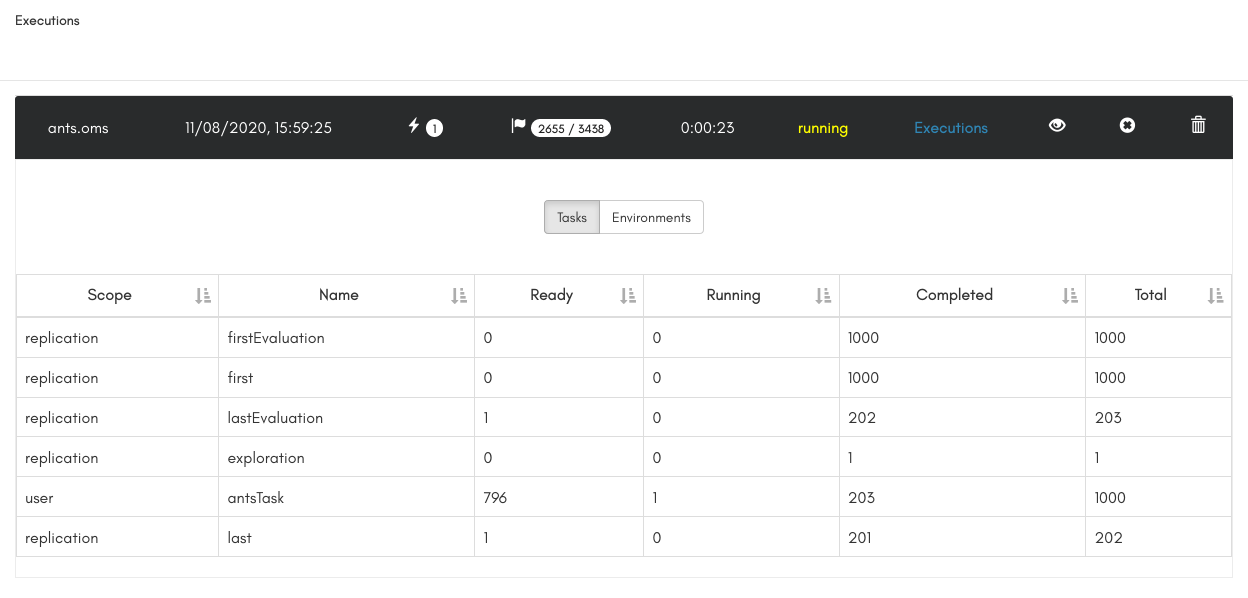
To execute a workflow you just need to have the oms script open in the GUI and click on the "Run" button. The execution panel will then open for you to monitor the execution, as shown below:
Model outputs 🔗
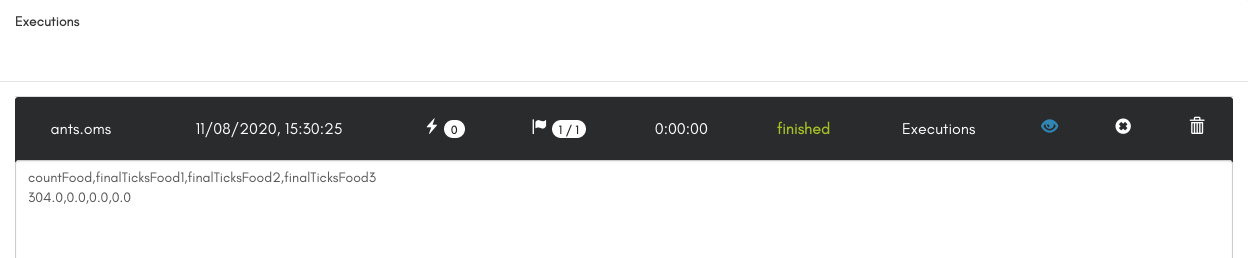
Once the model execution is over, and since we asked in the workflow todisplay the outputs, we can look at the output values countFood, finalTicksFood1, finalTicksFood2, and finalTicksFood3 by clicking on the "output" link in the Executions panel.


